Each dataset has a settings menu for managing the dataset itself: rename it, duplicate it, import or export data, connect it to other datasets, or delete it.
Open your system and find the dataset in the left sidebar. Hover over it and click the ⋮ icon to open the settings menu.
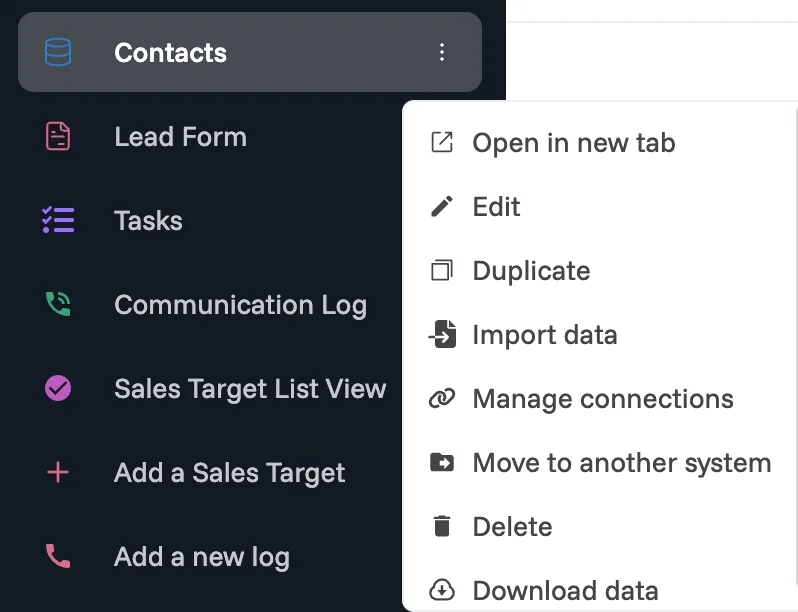
Option | What it does |
Open in new tab | Opens the dataset in a separate browser tab. |
Edit | Rename the dataset or update its description. |
Duplicate | Creates a full copy of the dataset, including its structure and data. [Verify: does the copy include connections and Smart Column settings? Where does the copy appear?] |
Import data | Add more rows to this dataset from a CSV, XLS, or XLSX file. |
Manage connections | Sync data between this dataset and others. |
Move to another system | Relocates the dataset to a different system in your workspace. [Verify: what happens to connections and interfaces that use this dataset?] |
Download data | Exports the dataset as a CSV or Excel file. |
Delete | Removes the dataset and all its records. [Verify: is there a confirmation dialog? Can a deleted dataset be recovered?] |
Download data
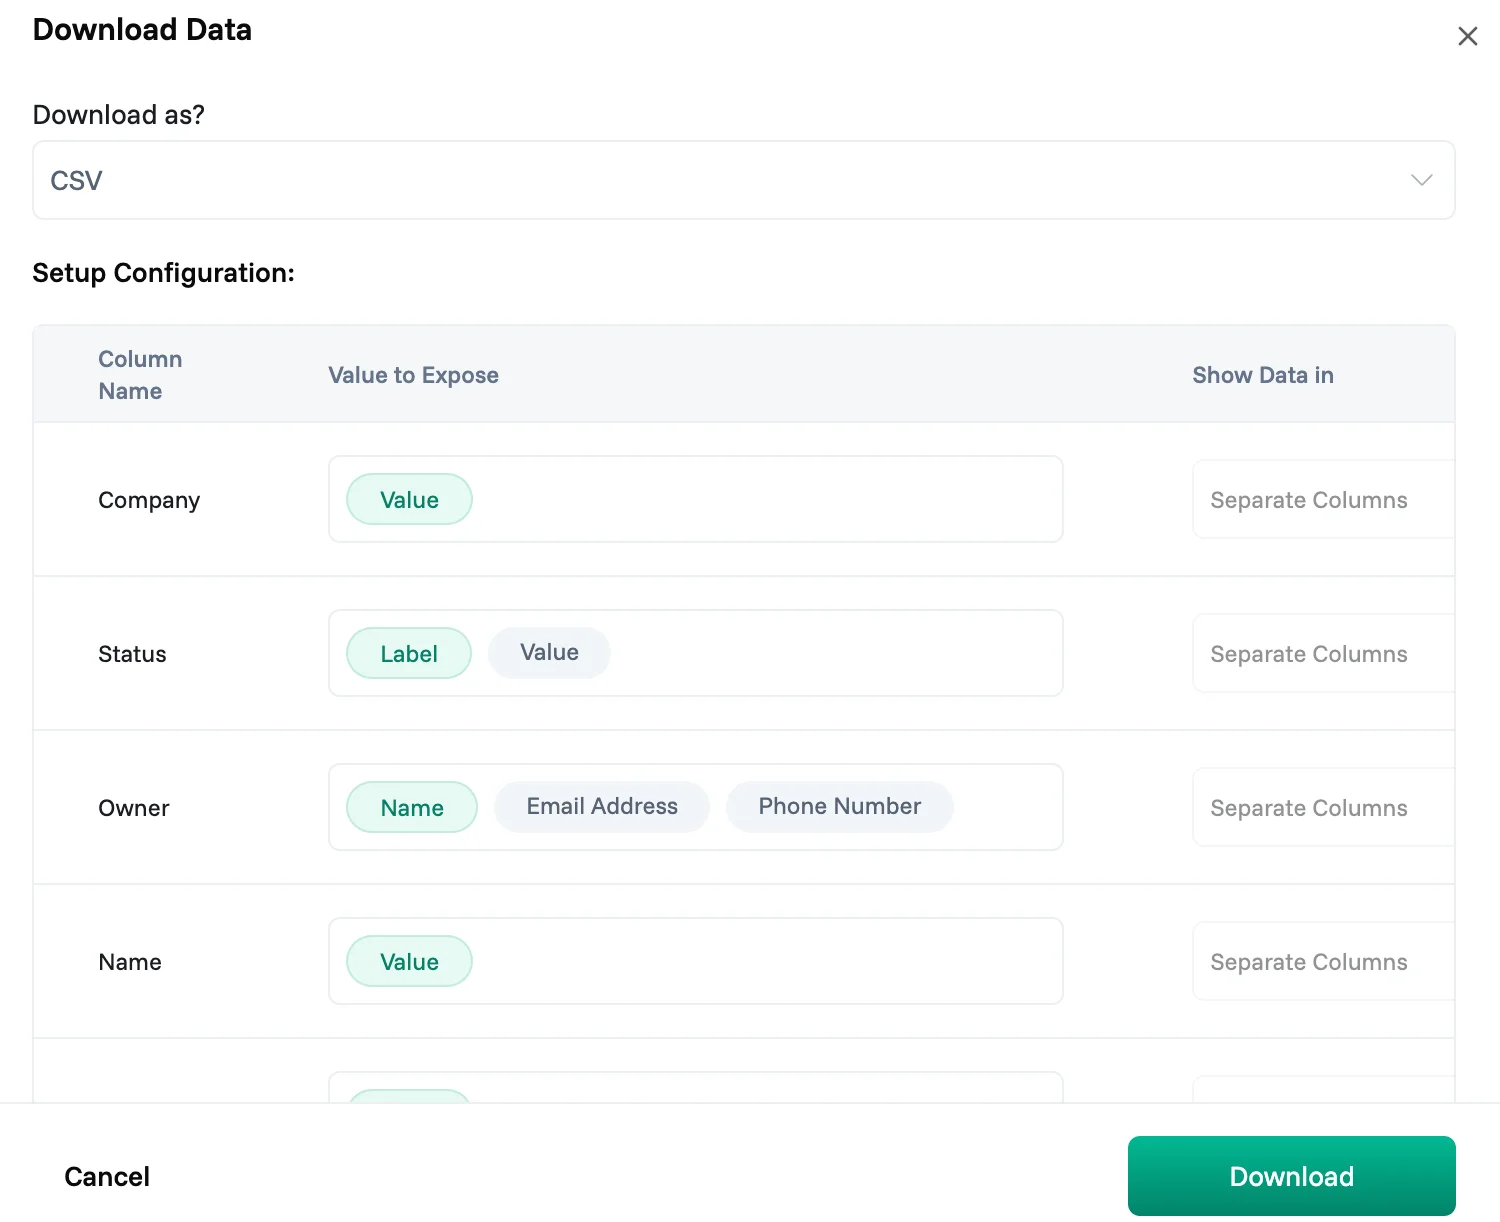
Click Download data to export your dataset. Before downloading, you can configure exactly what gets exported.
Format. Choose CSV or Excel from the Download as? dropdown.
Setup Configuration. For each column in the dataset, you can control three things:
Value to Expose. This setting controls which data is exported for each column. For most columns, the only option is Value, meaning the column's content is exported as is. Columns that point to a person or another record show more options. A Reports To column, for example, points to a person, so you can choose whether to export their Name, Email Address, or Phone Number.
Show Data in. Some columns can hold more than one value in a single cell, such as a Team Member column with two people assigned. Choose how these appear in the export:
Separate Columns: each value gets its own column
Join as Comma Separated Values: all values are combined into one cell
To Include. Toggle off any columns you don't want in the export.
Import data into an existing dataset
Use Import data to add new rows to a dataset that already exists, for example loading a new batch of contacts into an existing Contacts dataset.
The import follows the same four steps as creating a dataset from a file: upload your file, select the header row, match columns, and validate.
For the import to work, the column names and types in your file must match the columns already in the dataset. Mismatched columns show a validation warning before you can proceed.
Manage connections
Manage connections lets you sync data between datasets so shared information stays consistent without manual copying. For example, you can forward customer names from a Contacts dataset into an Orders dataset, so the Orders dataset always uses the same names.
A connection has a direction:
Connection type | Direction |
Forward To | This dataset sends column data to another dataset. |
Accept From | This dataset receives column data from another dataset. |
You only set up a connection from the forwarding side. Once Dataset A forwards to Dataset B, the connection automatically appears under Accept From in Dataset B's settings. Nothing needs to be configured on the receiving dataset.
To set up a connection:
Click + Add Connection.
Give the connection a name.
Under Forward to System, select the dataset you want to send data to.
Click Filter Columns to choose which columns to include in the sync.
Optionally, click Edit Forwarding Condition to control when data is forwarded. For example, only forward a record once its status is marked complete. [Verify: example condition, replace with a real one]
Click Submit.
How syncing works. Once connected, data syncs from this dataset to the connected one on an ongoing basis. If you remove the connection, syncing stops, but any data already synced stays in the other dataset. It is not deleted.